
I was introduced to vanlife in 2020 and haven’t looked back. I’ve now been living in a van since 2021, and I think it’s one of the most freeing and empowering lifestyles you can lead. Every vanlifer’s journey is different, and it usually involves more than one van over time. I started with a Toyota Hiace and now get around in a Fiat Ducato, which my dad and I did a complete van conversion renovation of at the start of 2022.
In this post, I’m going to detail the process of purchasing and renovating my current van, including all the costs involved. I’ll provide a bit of background first, including why and how I bought the Fiat Ducato. Then, I’ll go into more detail of all the things my dad and I changed, including what we added to make this my cosy home on wheels.
Disclaimer: This post contains affiliate links which means I get a commission if you buy a product through my link at no extra cost to you. By doing so, I can keep this blog going and continue to create helpful guides for you. Read more: Privacy Policy
My First Van: 1997 Toyota Hiace Pop-Top
My parents had a huge motorhome bus, that my mum didn’t like driving. While I was overseas in 2019, she bought an old Toyota Hiace Pop-Top just to take on short trips over the summer.
When I came home for Christmas at the end of 2019, she told me to take it for a trip. So, in January 2020, I took the van to the Grampians National Park for a week. I fell in love with vanlife instantly and when I got home, I said, “You’re not getting this back!”.

We all know what happened in 2020. My parents escaped in their bus to Queensland, but I managed to get in a couple more trips in the Hiace between lockdowns in Victoria, including to Wilsons Prom and Great Ocean Road. In 2021, I didn’t want to get stuck home any longer, so I took the Hiace and left in March for good. I didn’t come back until the end of the year and managed to drive it all the way up to Darwin and back.
I had an absolute ball; 2021 is still one of my favourite years ever (read my 2021 in review). It introduced me to a whole new lifestyle, plus exploring both South Australia and the Northern Territory for the year was incredible. I knew vanlife was going to be my lifestyle of choice from then on. But, I decided that if I was going to do this whole “vanlife” thing long term, then I needed more space. Introducing my new van: a 2003 Fiat Ducato.


Why and How I Bought This 2003 Fiat Ducato?
Living out of the Hiace van for nearly a year was a lot of fun and taught me a lot, but it wasn’t liveable long term for me. You only had to look at the mess inside to see that it was hard for me to live in it on the road full-time!
So, began the search for something bigger. Dad began looking online in mid-2021. We were really looking for a Medium-Wheel Base, High Roof, Mercedes Benz Sprinter, automatic transmission and preferably with reasonable kms on the clock. After months, we never really found anything that we were happy with. Most had too many kms and those with low kms were way out of my budget.
Dad had almost given up. Then, he sent me this Fiat Ducato. The advertisement on Facebook Marketplace had just one photo and about two sentences for a description. It was a bit strange, but it ticked some of our boxes, so Dad gave him a call. Turned out, the owner didn’t have a mobile phone or internet and had gotten someone to put the ad up for him. He lived in regional Victoria, so Mum and Dad quickly drove up to check it out.
I was still in South Australia on my way home in the Hiace at the time, and they sent me all these photos of it. It was old and filthy on the inside (check photos below – yes that’s mould on the bed!), but otherwise, everything else was solid. Plus, it was already a fully converted campervan, which meant most of the hard work was done. We could just alter or change what I wanted.
I rang Dad and said, “Just get it!”. So, I suddenly had just made the biggest purchase of my life to date at $34,000.


How it Looked When I Got it Home
As I wasn’t home at the time, Mum and Dad managed to bring the van back home to the Yarra Valley. Dad got started on cleaning the van up, but I don’t think he realised how big of a job it was. He sent me updates each day and it was incredible. It went from being a really dirty, old van to looking pretty damn good.
Dad cleaned inside and out, and it came up even better than we thought. It was still quite dated inside and not quite the set-up I wanted, so I already had some plans for changes and renovations when I got home. And the fun began!

Van Conversion Renovation: Everything We Removed, Changed and Added
There were some obvious things like the curtains (enough of my friends told me they were the first thing to go!). But also, less obvious changes, like better off-grid capability and some modern touches like a reversing camera and Bluetooth stereo, that I wanted to add.
Originally, I thought of changing more of the actual layout, but in the end, it grew on me, and we only ended up making a couple of structural changes inside. Let’s take a look at all the things we renovated and changed:


1: Deep Cleaning
I already mentioned above, but Dad did an incredible job cleaning the van up. It was spotless when I got home, so I never got to see in person what it had really looked like. The photos say enough though!
Cost: Luckily Dad didn’t charge by the hour!
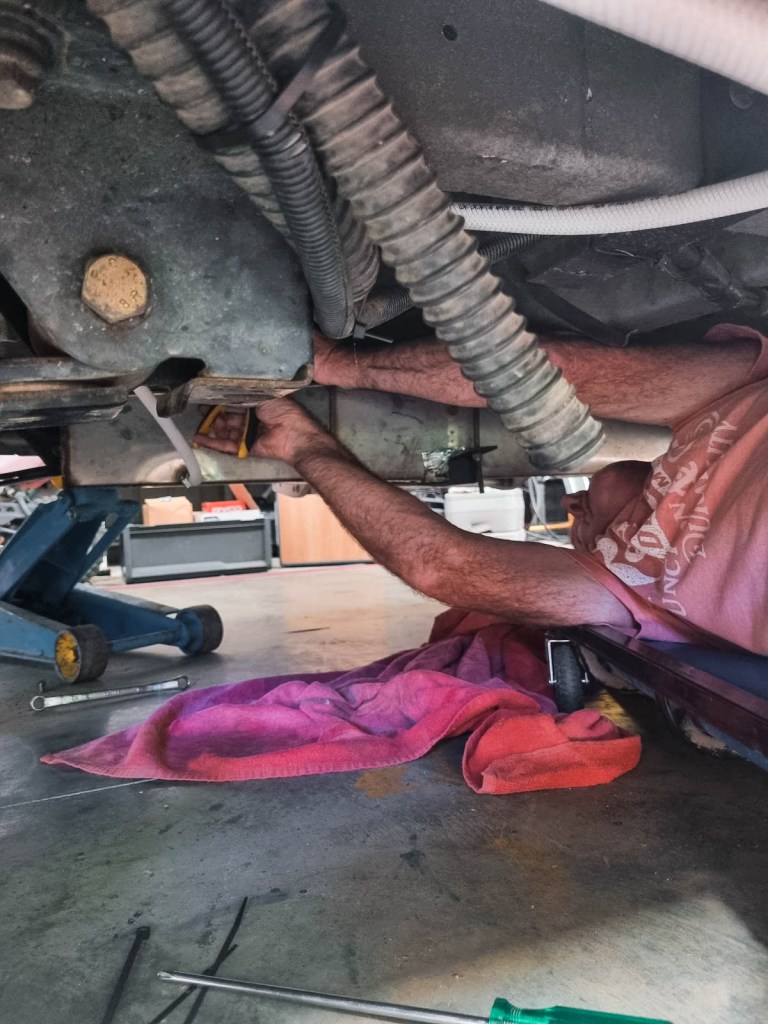
2: Mechanics for Roadworthy and Service
Then, some boring and expensive things had to be done. We took it to our family mechanics workshop for a roadworthy and service, to make sure it was all good to drive. It needed a couple of things, but otherwise it was fine.
Cost: $790

3: Fix Water Tank
One of the first problems Dad tackled was the water tank. The big stainless steel tank underneath the van was leaking and the water coming through the tap in the sink was very rusty.
Dad took the water tank off and got the hole patched and welded by a friend. He also flushed the water tank out completely a few times, and the water cleared up properly. I’ve not had a problem with the water since!
Cost: $0


4: Remove TV
Many of the appliances inside the campervan were useless to me. The aim was to live completely off-grid without having to plug into power, like I had in the Hiace. This meant everything had to run off 12v power through the battery and solar system.
Although it had a power outlet on the outside of the van to plug in, I was never going to use it. So, one of the first appliances we got rid of was the TV. I wasn’t going to be able to run it off the batteries and I was also very used to watching things on my laptop or phone.
To hide the power points and screw holes in the wall where the TV had been, Dad put a hook so I could hang my hats, which I love! I then purchased a basket from the op shop for $2 and Dad secured it to the bench with velcro (the plant came later!).
Cost: $0


5: Reversing Camera and Bluetooth Stereo
Dad and I made a trip down to Supercheap Auto and picked up a reversing camera ($130) and Bluetooth stereo ($150). Dad had done a stereo before, so he wired both the reversing camera and stereo himself.
I don’t think he realised how much time it was going to take though, because it ended up being a couple of days work. The reversing camera especially took time, because he wanted to run the wiring from the back of the van all the way to the front while hiding it through all the cabinets. He managed to get it working so when I dropped the van into reverse it switched on – perfect!
Cost: $310


6: Replace Fridge and Turn Cabinet Around
One of the most important things to replace was the fridge. The van had an old caravan fridge in it that was still working, however, they draw way too much power if I wanted to live off-grid like I had in the Hiace.
Bushman Fridges were the best in the business – according to virtually every grey nomad on the road. Luckily, their main warehouse is in Research near Eltham, which is just a short drive away from home. I got the 85L 12v Fridge and Freezer for $1400.
The original van layout had the fridge opening out in the doorway of the van, which I thought was strange and inconvenient. So, once Dad had taken the old fridge out, he dismantled the cabinet and then reassembled it facing inwards. He had to make some size adjustment for the new fridge, and he added in a shelf above the fridge too. It worked out nicely and I much prefer the new layout.
Cost: $1,400


7: Replace Flooring
The flooring was old, scratched and stained, so we pulled that up to the bare chipboard underneath. On a trip to Bunnings, we got a pack of laminate flooring for $55 in a light timber colour.
My brother had done floating floors before, so he offered to do it. It was a bit of an annoying job, because the floor wasn’t completely smooth, but he managed to get it done and fitted around every corner and edge.
Cost: $55


8: New LED Lights and Reading Lights
The van had old globes in the roof which I realised got really hot after only being on a little while. I didn’t like the idea of that, so we got some LED roof lights to replace the old ones.
Then, Dad also put in some new LED reading lights above the bed which are really handy to have at night. They’re not expensive either. Dad wired them all up himself.
Cost: $140


9: Add Solar Controller and Inverter
I wanted to be able to live off-grid and never have to plug into power. We were going to go with a Lithium battery like we’d put in the Hiace, but the Ducato had two brand new AGM batteries (purchased by previous owner), so we decided to just stick with them for now and see what I think.
It also already had a solar panel on the roof, but Dad decided to put in a better solar controller, so it would regulate power much better. We got a MPPT 30A 12v/24v solar controller for $250 and Dad fixed it under the bed at the back of the van, close to the battery system.
I then needed an inverter so I could charge my laptop and cameras on the road. We went with the same inverter that I’d had in the Hiace which cost $130. It had worked well but not for long in the Ducato, as it blew up one night when I turned it on! So, I replaced it with a better Repco one instead in Bathurst, NSW. Don’t get a cheap inverter! That’s also under the bed, but can be accessed from inside the van.
Cost: $380 (the second inverter then cost $430)


10: Fix Outdoor Shower
The outdoor shower on the Fiat was working pretty well, except that it squirted water inside the van when we turned it on. Dad tried replacing fittings and securing the hoses better ($20), but the pressure still seemed too high for the shower. He also replaced part of the shower box itself which cost $70.
In the end, we simply turned down the outgoing pressure at the water pump and that made probably the most difference!
Cost: $90


11: New Mattress
The old mattress was disgusting, so I was going to have to replace that with something. I hadn’t even began looking at campervan mattresses, but my parents had just ordered a new custom made one for their campervan. Unfortunately, when they got it home, it wasn’t the right fit as they hadn’t worked out the measurements properly.
Coincidently, the mattress fitted perfectly in my van! So, they kindly gifted it to me instead. It’s literally one of the most comfiest beds I’ve ever slept on, and I still go to bed every night appreciating how cosy I am in my van.
Cost: Free (for me!)


12: Make New Curtains and Cushions
Surprisingly, one of the most expensive parts of the van conversion renovation, were the curtains. I paid a visit to Spotlight and decided to go with blockout curtain fabric, which is admittedly more expensive than regular curtain material or just sheer material. But, I’m glad I spent the money, because they really do block out light from outside well.
Luckily, the curtain tracks were already in place and I saved most of the hooks from the old curtains. But I did add a long curtain behind the driver’s seat to block out the light and add more privacy between the cabin and the living space.
I bought one packet of new hooks ($3), 12m of gather curtain taping ($60), and a LOT of blockout curtain fabric ($220).
I then spent a couple of days at my nan’s place, queen of all things sewing and crafts. I let her measure and cut, while I sewed the seams on all the curtains, and the gather taping in place. We got it all done over a couple of days, and I was so happy with the result. It made the inside of the van look completely new; brighter and more modern.
I’d also bought new fabric for cushion covers for the seat at the dinette, along with new foam. The old ones were quite disgusting and beyond saving, despite attempting to clean them. So, I picked out some thick woven fabric from Spotlight ($24) and then went to Clark Rubber for the foam. Two squares of the firm foam custom cut were $106. I let Nan do the cushion covers, because they were a bit tedious and they came out great!
Cost: $413


13: Put Up Spice Racks and Fit Drop Down Bench
Similar to my parents kitchen setup in their campervan, I liked the idea of having a drop-down bench. The layout of the kitchen in my Fiat didn’t actually provide much bench space at all, so I looked into adding a drop-down bench next to the gas stove.
Bunnings sold the spring loaded folding brackets ($20 for 2) and Dad found a nice piece of hardwood lying around the shed and sanded and polished it up as the bench top. He and my brother fitted the brackets and bench top so it lined up with the cabinet perfectly.
I then wanted a couple of spice racks along the empty wall space above the windows inside. I found some I liked from IKEA, which cost $20 for two, and Dad fitted those easily.
Cost: $40


14: Fit Oven
I’d heard about a 12v oven from my best friend’s partner, and I instantly knew that I wanted one too. An oven is something I miss the most when I’m living in my van, so the thought of having one running off 12v was very appealing. He told me of a small brand called Travel Buddy which is Australian owned and made, in fact right in Bendigo in Victoria.
I got their Travel Buddy 12V Oven Large and Dad fitted it where the old microwave had been (something I was not going to be able to run on 12v!). It does take a while to heat up and uses a bit of power, so I tend to only use it on long drives, when I can have lunch or dinner heated for me over a couple of hours. For the cost, I think it’s worth it!
Cost: $288


15: Replace AC Unit with New Skylight
The last major van conversion change we made was to get rid of the Dometic air conditioner in the roof. It was another item I wouldn’t be able to run on 12v, so I decided to remove it, sell it on FB Marketplace and replace it with another skylight. Although I already had a skylight hatch in the front section of the van, I thought another one closer to my bed would be great for added air flow and light.
Luckily, the one we found from Finch, fitted perfectly inside the whole in the roof that had been left behind by the air con. Dad fitted the skylight in place after a bit of help from YouTube videos, and siliconed the roof. He’s had to re-silicone the roof again since then, but I have to say the extra skylight hatch is probably one of my favourite things we added!
Cost: $285


16: Random Hooks for Decorating
The last bits and pieces mostly consisted of a bit of decorating. I got Dad to put up a few random hooks for decorating. I mentioned earlier I got a hat hook for where the TV was. But I also, got hooks added on the wall above my sink, on the fridge cabinet and a couple of others later on.
Dad has a big collection of screws and random hooks he’s collected over the years, so it was just about finding ones that I liked or that fit. The only hooks I bought were the large adhesive ones for hanging my mesh fruit bag next to my fridge. These were from Bunnings, which you can check out here.
Cost: $5 (otherwise mostly free!)
Other Misc. Additions
Some additional things I got before I left on my first road trip in the van were a new spare key, gas detector which Dad fitted, a removable magnetic fly screen for the sliding door, and random jars and a basket for storage and visual appeal (the latter obviously very important!). I also scored a portable toilet from an old campervan and it fits nicely in the cupboard under the dinette.
- Spare key: $150
- Flyscreen for sliding door: $220 BUY HERE
- Gas detector: $50 BUY HERE
- Bowls, jars, and basket from op shop: $32
- Portable toilet: $0 (mum and dad had one from a previous campervan) BUY HERE


The Finished Product: A Home on Wheels
I was stoked with how the van cleaned up! The real MVP of the whole van conversion renovation was Dad, who managed to do most of the work. I left for my first trip in it in February 2022, returned home to make a couple of adjustments and then left for the east coast for the rest of the year.
I really fell in love with the van and I had a lot of people come up and ask about it or want to see inside (this still happens often!). For now, this is my home on wheels and I wouldn’t change a thing.
Total Cost Breakdown of Van Renovation
| Item | Cost |
|---|---|
| Service and Roadworthy | $790 |
| Reversing Camera | $130 |
| Bluetooth Stereo | $150 |
| 12v Fridge | $1,400 |
| Soldering Bits and Pieces | $30 |
| Flooring | $55 |
| LED Lights | $140 |
| Solar Controller | $250 |
| Inverter | $130 |
| Outdoor Shower Bits and Pieces | $90 |
| Blockout Curtains | $283 |
| Dinette Cushions | $130 |
| Spice Racks | $20 |
| Drop-down Bench | $20 |
| 12v Oven | $288 |
| Skylight Hatch | $285 |
| Spare Key | $150 |
| Flyscreen | $220 |
| Gas Detector | $50 |
| Hooks and screws | $5 |
| Bowls, Jars, and Basket | $32 |
| TOTAL COST: | $4,648 |
A Van Conversion is Never Over!
A van conversion renovation is never really over. There’s always new things to add, things to fix or adjust, and new problems arising. This breakdown of costs is everything we did to the van over the first few months after I bought it (from Dec 2021-Feb 2022). I’ve obviously spent a bit more and added new things to it since (although nothing major).
With a secondhand campervan, it becomes a constant project and there’s always going to be little things I get Dad to do everytime I end up back home. I hope this post has helped you get an insight into the kinds of things I changed to the old Fiat campervan. I honestly wouldn’t change anything about it now; I fall in love with this lifestyle and this van more everyday.
Pin this post


[…] you read my 2021 in review, you’ll know that 12 months ago I was halfway through renovating my Fiat Ducato van, planning some trips up to the High Country and rebranding this entire blog. These were some big […]
[…] towns. I’ve spent the last two autumn’s travelling up and down the South Coast in my Fiat Ducato campervan, so I’ve explored my fair share of camping spots. This post will take a look at my top 10 […]