
Trekking in Ladakh is one of the highlights of any trip to the region. There’s no better way to experience the unique landscapes, interact with the local people, and appreciate the remoteness of the area than being on foot. If you’re looking for a short trek of only a few days, then I highly recommend the Sham Valley Trek.
While many hikers head off on the 5-day Markha Valley Trek in Ladakh, if you’re short on time or not keen to head up to over 5000m in elevation, then the Sham Valley Trek is the perfect alternative. With homestays to stay along the way and relatively short days, you can enjoy the local Ladakhi culture and and soak up the stunning views without having too much to organise or carry.
On my most recent trip to Ladakh, I took my mum on the Sham Valley Trek and we enjoyed our three days of walking through this beautiful part of India. If you’re looking for an independent trek, here’s everything you need to know about the Sham Valley trek.
Disclaimer: This post contains affiliate links which means I get a commission if you buy a product through my link at no extra cost to you. By doing so, I can keep this blog going and continue to create helpful guides for you. Read more: Privacy Policy
Quick Overview of the Sham Valley Trek
- Distance: 27 km
- Time: 2-4 days
- Difficulty: Medium
- Highest point: 3,900m
- Start: Likir
- Finish: Tingmosgang (Temisgam) or Ang
- Trek style: Homestay

Is the Sham Valley Trek Worth Doing?
There’s been a lot of talk over the last few years about road construction in the Sham Valley ruining the trekking experience. I heard people saying it “wasn’t worth doing the Sham Valley trek anymore”. But I disagree.
I think it’s definitely worth doing the Sham Valley Trek if you want something that is only three days and not overly taxing (it’s still not easy though, read the next section to find out why). It’s the perfect introduction to high altitude trekking in Ladakh.
While there has been a road built which now connects each of the villages from Likir to Tingmosgang, I would say the trek still provides an interesting experience. The trek does NOT follow the road; there are local trails to follow which are more direct and take you over unique terrain.
Plus, the real highlight of the trek is the homestays and interacting with local people, which is still a great reason to do the Sham Valley trek.

Is the Sham Valley Trek Easy?
The Sham Valley Trek is often called the “Baby Trek”, when compared to the longer and higher Markha Valley Trek. However, that’s a bit deceiving. The Sham Valley Trek is not easy.
Yes, the days are relatively short in distance, but the altitude will get to you and slow you down considerably, compared to your normal walking pace. And while it may be lower in elevation than the Markha Valley trek’s highest point, the different is the Sham Valley Trek has multiple passes, at least 1 per day, whereas the Markha Valley only has one big one on the last day.
This means, in my opinion, the Sham Valley Trek has a lot more ups and downs, climbing up hills that can really tire you. So, while it’s definitely achievable, I wouldn’t say it’s easy! Moderate is a good way to describe it (for high altitude treks).

When to Do the Sham Valley Trek
As with any trekking in Ladakh, you really should aim to do this trek in the summer season. The main trekking season runs from June until September, although because this trail isn’t overly high, you could probably still do it in May or into October depending on snowfall.
We did this trek in mid-July and had nice weather. No rain, warm days and not too cold overnight temperatures.

Can You Do the Sham Valley Trek Without a Guide?
Yes! The Sham Valley Trek can be done independently without a guide. Similar to the Markha Valley Trek in Ladakh which I hiked solo, the conveniently spaced villages and homestays on the trail makes it entirely possible to just carry a small backpack and walk between villages.
However, I would say that it’s ideal if you have some hiking experience under your belt. Navigation is not as straightforward as you might expect with no signposts or markers. However, with the help of a GPS app, local knowledge and common sense, most people will be fine hiking the Sham Valley alone and without a guide. Read more about navigation on this trail below!

How to Get to Likir
In theory, you should be able to get a local bus to Likir. Ask at the Leh bus station about the updated timetable, but in 2023 there was a bus in the morning and one around 1pm. However, this can be very inconsistent and depends on demand. It should cost around 150 INR (AU$3).
The alternative and more reliable option is to hire a taxi to drop you at the trekking point in Likir. It’s only about 1.5 hour drive to Likir from Leh and the ride should cost 2000 INR (AU$40) for the whole vehicle.
Tip: A smart thing to do is to tell the same driver to pick you up at the end of your trek in three days time. The driver’s will know where the trek ends and it’s convenient to have someone already waiting for you at the other end (especially considering there’s no phone signal).
Read next: Where to Stay in Leh For All Budgets


My Experience on the Sham Valley Trek
If you want to find out what it’s like to trek the Sham Valley Trail, then read about my experience with my mum.
Day 1: Likir to Yangthang
- Distance: 11 km
- Time: 4.5 hours
We left just before 9am in our pre-arranged taxi from Rock Castle Residency in Leh. We left most of our luggage back there and just carried a small daypack each for the trek. Our driver pointed out that there were many people lining the main highway leaving Leh, as the Dalai Lama was due to arrive at the airport that morning.
The drive to Likir was beautiful, and only took about 1.5 hours. While visiting the Likir monastery was an option, we decided to just hit the trail and get going. Our driver dropped as towards the end of the village where the trail began, so it wasn’t hard to find on Maps.Me.
The trail dropped down and crossed a small stream on a bridge before climbing back up through the last few houses of the village. A kind lady stopped to hand us some dried apricots as she walked with her cows.
The trail basically ran parallel to the road, but far enough away that we weren’t bothered by the few vehicles that used it. We climbed steadily for over a kilometre, before the trail dropped down the side of scree slope off the side of the road.
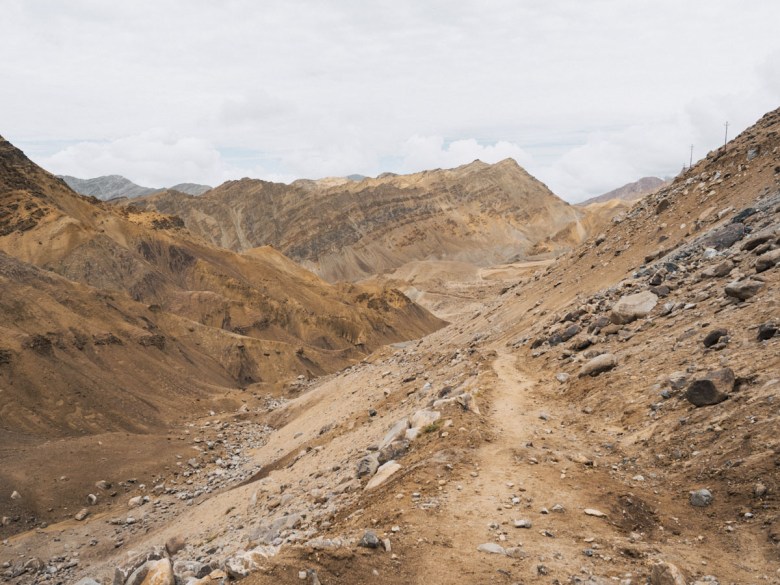
There were no markers to follow, but the trail was very visible and heading in the right direction. We reached the tiny village of Sumdo, which the trail skirted around the outside of, and we began a steady climb of over 2km, gaining over 300m up to around 3,750m.
At this point, my mum was really introduced to high altitude trekking. The thin air made it tough and we slowed our pace. Once we reached the top of the hill, the trail met back up with the road and we found a spot off the side to eat our packed lunch from Leh. It was midday.

We could see the village of Yangthang ahead of us, and we dropped down on a slippery, scree trail towards it. The trail actually dropped below the height of the village, so we had one final short hill to get up to the plateau that the small village sits on.
Yangthang was completely deserted of people. I walked around for a little while trying to find a homestay, but with no luck. A young guy informed us because of the Dalai Lama arrival, everyone had locked their homes and gone into Leh.

We finally found a place, a relatively new homestay that had been affected by recent rainfall and was under repairs. Despite not speaking the best English, the man took us in and gave us a room, with a shared bathroom. Soon, a French couple also came in to stay the night.
The man instantly made us tea and then my mum went to rest for the afternoon. I headed out for a late afternoon stroll through the old village, which seemed more of a ghost town with nobody around. The sky was overcast, but I could still see some beautiful snow-capped mountains in the distance.
Dinner was delicious, a rice, dahl and cauliflower curry. The man was quite entertaining, trying his best to communicate with us in broken English. We actually had a really memorable night there, and were very grateful he had allowed us to stay.

Day 2: Yangthang to Hemis Shukshapan
- Distance: 7.5 km
- Time: 3.5 hours
We were in no rush in the morning, knowing that despite our slow pace we would still be in the next village in the early afternoon. We had breakfast around 8am and the man made us a packed lunch for the day. The young guy who had spoken with me the day before appeared and informed us that he used to walk to school in Hemis Shukshapan every day, and we would be following the same trail they used to use to get there.
We could see the pass we had to reach from the village, and he said as long as we were following the concrete BSNL stumps then we were right. That was great advice and it really helped us a lot as this section was not marked at all on Maps.Me.

As we were leaving just after 9am, we stopped to talk to an Israeli girl who had already walked all the way from Likir that morning. She wasn’t sure of the way to Hemis so she asked to join us, and we set off together.
We walked to the edge of the village and then had to follow a trail down to the bottom of the valley. The sky was a bright blue and the sun was warm, making for great views across the mountains either side of us.
We crossed a little bridge over a stream at the bottom and then hiked up through the last houses of Yangthang village and emerged onto a dirt road. It wasn’t clear after that which way to turn. The French couple decided to turn left and find a trail climbing the ridgeline towards the pass. I decided to head right and we found the BSNL marker just like the guy had told us.

From there, it was a long ascent up to the pass, climbing on a skinny goat track through the valley. The concrete markers appeared every so often, plus the power lines were heading up towards the pass as well, so we were confident we were on the right track.
The sealed road zig zagged above us to the right as we got closer to the pass. We met up with the French couple again, their trail had been slightly steeper and rockier, but in the end the five of us made the last push up the steep trail to Tsermanchan Pass together. At 3800m, the trail had met back up with the sealed road.

It was 12.30pm so we stopped for lunch and a break and enjoyed the view of our next village Hemis Shukshapan down below. From there, it was a clearly defined trail hugging the left side of the valley as it descended all the way to the village. We spotted some Himalayan gazelles on our way, until we started to see more familiar cows and farmland.
A lady popped her head above some crops and offered a homestay. We followed her to check it out. It was a very nice place, even offering proper beds and an ensuite bathroom with hot showers.
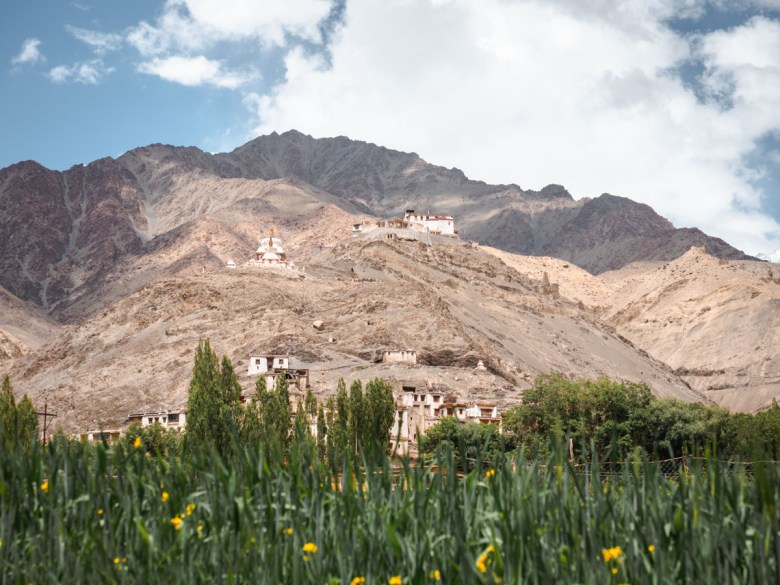
We accepted immediately knowing we wouldn’t find much better elsewhere, it was only about 2pm. Some other trekkers came in later and the place filled up. I went for a village walk at 5pm and what a treat! It was a very picturesque place, with a big buddha statue standing high above town offering exceptional panoramic views.
Dinner was served to everyone at 7.30pm. It was another delicious plate of rice, beans, carrots, peas, and capsicum, fresh from the gardens.

Day 3: Hemis Shukshapan to Ang
- Distance: 9 km
- Time: 4 hours
Not in a hurry again, we left at 9am. We had to walk across the village and head out to the west, towards our first of two passes for the day. We walked up a gentle hill to the pass marked by prayer flags at 3,750m. From there, we could look down into a spectacular valley that we were about to descend through.
This was the most difficult part of the whole trek to navigate. There was an old dirt track hugging the left side of the valley (with the BSNL markers along it) and a skinny, goat track hugging the right side down through the valley. I thought the left option made more sense.

As we got down towards the bottom, the valley took a sharp turn to the left. We could see some people behind us had taken the same way as us, but also a small group who had taken the other trail. It was difficult to work out where the other trail went, and I had memories from the Markha Valley trek when Maps.Me had led people astray. We waited for our French friends to arrive and we discussed it together.
We figured that if we continued down through the valley we could eventually head around and up to Ang, but we weren’t 100% sure. The small group of people had continued on that skinny goat track and seemed to be heading up steep switchbacks to the top of the road above us. We had heard that the last day had a very tough climb, so in the end we decided to follow them.

We had to scramble a bit across scree slopes to reach the little track. Then we followed it as it spectacularly climbed on a steep angle up and up to the top. The views were incredible and it was tiring work, but we made it to the final pass marked by prayer flags on the road at 3,850m.

We had a short break up there, admiring the views stretching right across in front of us. From there, it was a very short descent of about 2.5km to where our driver was patiently sitting waiting for us. My mum was extremely relieved to finish, and we walked another few hundred metres to the car from where we could sit back and enjoy the beautiful drive back to Leh.
Of course, we got dropped in the main market of Leh so we could head straight to a cafe for a late lunch!

Finishing the Trek in Ang or Tingmosgang
The trek traditionally finishes in Tingmosgang (also written Temisgam). However, with road construction reaching Ang now, we had our taxi pick us up in Ang. This shaves off a few kilometres of walking on the road.
However, Tingmosgang is a really pretty village. We met some other hikers who opted to end in Tingmosgang and stay the night there in a homestay, before catching either the bus the next morning back to Leh or getting a taxi.
This is a nice option if you have time and aren’t in a hurry to get back to Leh.
Getting Back to Leh
There is a bus that runs from Tingmosgang to Leh in the morning, however, the timetable for this bus can be a little unreliable. Check at the Leh bus station before leaving for your trek if this bus is running (in 2023, these buses were hit and miss).
I highly recommend having a taxi waiting for you to take you back to Leh. We had arranged the same taxi who dropped us in Likir to pick us up in Ang at the end of our trek. The drive back from Ang took about 2.5 hours and cost 4500 INR (AU$85).

Everything You Need to Know About the Sham Valley Trek
Here’s some more information on what you can expect on the trek, as well as practical details about packing, navigation and drinking water.
Accommodation
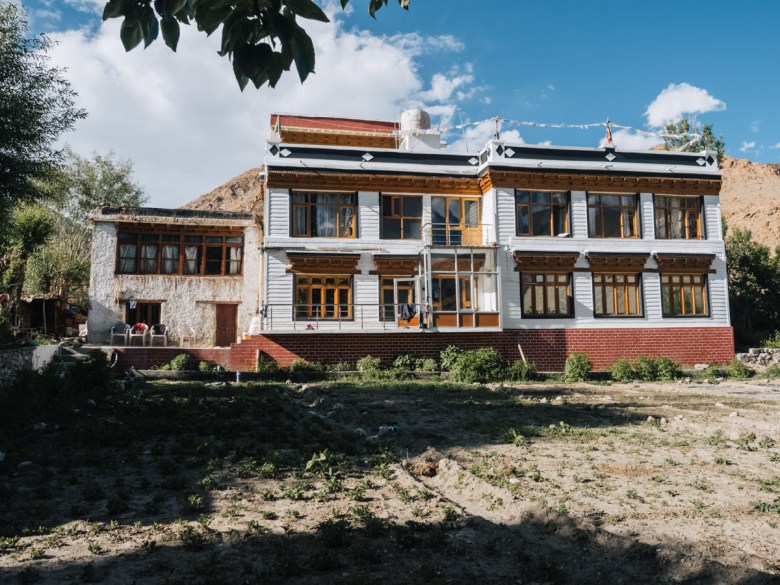
One of the highlights of the trek is the homestays you get to stay in along the way. They are usually simple but very comfortable, with some varying quality throughout the villages. You can’t really pre-book the homestays but there’s plenty of choices to simply wing it and arrange on arrival.
The hosts charge a flat rate of 1500 INR (AU$30) per night, which includes a private room and three meals. Some places even have attached bathrooms with showers, but mostly you will have shared bathrooms.
Don’t expect hot showers or Wi-Fi or other luxury additions. But interacting with your host and hanging out with the family is usually one of the highlights of the trail, and that far outweighs whatever comforts might be missing.
You can simply walk around the village when you arrive and check out available homestays by asking the host/owner. Otherwise, you’ll also have people running up to you offering a room as well.

Food and Water
There are no restaurants along the trail once you leave Likir. However, the homestays provide all that you need. The price for your room also includes three meals; dinner, breakfast and a packed lunch.
If you also want some snacks while hiking, I’d recommend buying them in Leh before you start. The packed lunches usually include, chapati/roti, chocolate bar, juice box, and sometimes a boiled egg or potato.
Dinner was usually a delicious home-cooked meal of rice, dahl and veg curry, depending on the local seasonal vegetables. Breakfast was more simple with roti/chapati and an omelette or egg, tea and coffee.


We also enjoyed a cup of tea and some biscuits when we arrived at the homestays too in the afternoon, which was a nice touch.
The homestays can usually supply drinking water that has been boiled. I’d recommend carrying a Lifestraw bottle or other filter bottle so you can feel safe drinking any of the water, without purchasing plastic bottled water.
Tip: For the first day, buy a packed lunch in Leh from one of the cafes or bakeries, or ask your accommodation in Leh to organise one for you. The other option is to have lunch somewhere in Likir before starting.

Navigation
If you’ve read about our experience on the trail above, you’ll know that navigation is not always straightforward. There are no official markers or signposts to follow, so being aware of your surroundings, using some common sense, asking locals and having Maps.Me helps a lot.
Here are some important tips from my experience for each day:
The first day was pretty straightforward as the trail was clear and correctly outlined on Maps.Me from Likir to Yangthang.
The second day from Yangthang to Hemis Shukshapan is less obvious and not marked on Maps.Me at all, but with some local tips we managed fine. Once leaving the edge of Yangthang village, you should follow the BSNL concrete markers/posts which head up through the valley towards the pass. You can actually see the pass from Yangthang, it’s where the powerlines pass through the valley, so as long as you’re heading in that direction, you’ll get up to the pass.
On the third day, the BSNL concrete posts will only guide you so far, but the trail is correctly marked on Maps.Me. From Hemis Shukshapan the trail heads out of the village and is easy to follow to the first pass. From there, follow Maps.Me, as it takes you down, sticking to the RIGHT of the valley. Then, you’ll come to a part where the valley bends to the left and heads down, but you need to head RIGHT and climb the steep switchbacks up towards the sealed road and last pass of the trek. From there, it’s downhill and easy to follow to Ang.

Phone Network and Signal
I had no Airtel signal the entire way. The only network you might get is BSNL, which most tourists don’t have, so don’t rely on any connection to the outside world. I promise it’s a nice digital detox!
What to Pack for Sham Valley Trek
Here’s everything that I packed on the Sham Valley Trek:
- Small backpack 35L
- First aid kit
- Deodorant, sunscreen, SPF lip balm, toothbrush and toothpaste
- Sunglasses and hat
- Buff
- Sandals
- Hiking boots
- Socks x2
- Hiking clothes (leggings, merino wool t-shirt, sports bra and underwear)
- Raincoat (didn’t need!)
- Pyjamas
- Down jacket
- Water bottles x2 (1 filter bottle and 1 metal bottle)
- Camera and battries
- Toilet paper
- Watch
- Power bank
- Money and passport
- Earphones
- Phone and charging cable
- Snacks
My mum also took hiking poles, which she thought were very useful. If you have some, they would help if you have bad knees or unstable on rocky, steep terrain.
Independent Sham Valley Trek Cost
- Accommodation and food x2 people: 6000 INR (AU$120)
- Taxis to and from trailheads: 6500 INR (AU$125)
- Packed lunch for first day and snacks (2 people): 1000 INR (AU$20)
Total: 13,500 INR (AU$265) for two people
More Travel Guides for North India
- Complete Guide to the Markha Valley Trek
- A Detailed 10 Day Leh Ladakh Itinerary
- Comprehensive Guide to Ladakh
- 25 Best Things to Do in Ladakh
- Best Places to Stay in Leh, Ladakh for All Budgets
- How to Get to Leh, Ladakh
- How to Explore Zanskar Valley
- Travel Guide to Spiti Valley
Pin this post


[…] to the Sham Valley Trek in Ladakh, you don’t need a guide to hike the Markha Valley trek. The trail is perfectly fine […]
Thank you so much for this guide. Since it was our first hike ever we found your story with mom very inspiring (regards to mom!).
Couple of updates from 2024:
– Day 1 – Yangthang – there are two parts of the village. One is completely new develooments. If you go to old village behind you get to stay in 200year old houses with village elders. Some have cool rooftops to chill.
– Day 3 – here you can follow straight the maps.me like a book. When you reach Rothing La with two toilets just go straight down the valley but keep right!. Someone even marked the trail with stone signage. It’s the most crazy landscape during the whole trip.
Thanks so much for the updates! Glad you enjoyed it