
While many trekkers have Everest Base Camp on their mind when heading to the Sagarmatha National Park in Nepal, I had other plans. I wanted to get away from the crowded trails but still wanted to be able to gaze at the roof of the world, otherwise known as Mount Everest. So, what do you do? The answer is the Gokyo Lakes Trek.
Hiking through Gokyo Valley is one of the most underrated trails in the country. The stunning scenery of the glacial lakes and the chance to get up to Gokyo Ri at 5357m allows you to have an unrivalled view of the highest mountains in the world.
Instead of flying into Lukla, I began the trek in Salleri which adds three days onto your itinerary but allows for a more gradual ascent (plus, minus the expensive flight ticket). This guide to the Gokyo Lakes trek will give you all the information that you need, as well as my day by day experience on the trail.
Disclaimer: This post contains affiliate links which means I get a commission if you buy a product through my link at no extra cost to you. By doing so, I can keep this blog going and continue to create helpful guides for you. Read more: Privacy Policy
What You Need to Know About Trekking to Gokyo
Here’s some essential information about planning your Gokyo Valley Trek from Kathmandu.
Quick Facts About the Trek
- Location: Sagarmatha National Park
- Distance: 142km
- Time: 12-16 days
- Highest point: Gokyo Ri at 5357m
- Difficulty: Hard
- Start/end: Lukla (or Salleri if you’re travelling by road)
- Trail: Out and back or can be a loop if taking an alternative route back
- Permits and fees: Khumbu Municipality permit and national park fees
- Accommodation: Teahouses
- Hiking requirements: Anyone can hike this trail, with or without a guide
- Optional add ons: Phortse and Tengboche, Renjo La or Everest Base Camp via Cho La
Best Time to Hike to Gokyo
As with most other trekking regions in Nepal, the best months are March-April and October-November. These seasons offer the best weather conditions for walking in the Himalayas. However, they’re also the most popular months, meaning that the trails and teahouses will be pretty busy.
The benefit of doing the Gokyo Lakes trek though is that it’s much quieter than the Everest Base Camp trek, even during these months.
The best time to see the Gokyo Lakes at their brightest blue is October-November. During March-April, the lakes can still be frozen over, which was the case when I was there in April after a cold winter. This meant that I only partially saw some of the blue colour around the edges.

Permits and Fees
The Everest Region is now a bit different to other popular teahouse trekking regions in Nepal. You don’t need a TIMS card, as the local Khumbu government collects the fees directly from trekkers rather it going through Kathmandu.
What this means is that instead of TIMS there is a Khumbu Rural Municipality Permit for 2000 rupees per foreign trekker. You can get this permit at Lukla or at the National Park counter in Monjo. The latter option is ideal for those starting from Phaplu/Salleri as you can bypass Lukla.
The Sagarmatha National Park fees are 3000 rupees for foreigners + 13% VAT. These fees can be paid at the National Park counter in Monjo. Alternatively, you can pay them in Kathmandu but most people don’t. In saying that, when you arrive in Monjo, there can be a long wait in high season as everyone is trying to pay fees and get permits at the same time.
Do You Need a Guide for Gokyo Lakes Trek?
As of 2023, guides are mandatory for foreign trekkers in Nepal. This means you’ll need to hire a guide for your Gokyo Lakes trek. However, some people have reported that it’s not strictly enforced. But, having a guide does elevate the experience, offering some cultural insights and high altitude safety. You can hire a guide for around US$30 per day.
Read next: What You Need to Know About Trekking in Nepal

Gear Hire
I hired a sleeping bag from Kala Patthar trekking gear, a tiny shop in a corner in Thamel, Kathmandu. I paid 90 rupees per day for a brand new -20deg down sleeping bag, which was probably the warmest bag I had out of all four treks in Nepal.
I bought an Everest Region map from one of the book shops that included the Three Passes, Gokyo and Base Camp all in one, in case I wanted to extend the trek or take an alternative route back.
I packed everything into a 30L backpack. Considering this trek was going to be double the length compared to the other treks I’d done in Nepal, I thought 30L was realistically not enough but of course I managed it somehow.
Read next: A Guide to Kathmandu
Acclimatisation on the Gokyo Lakes Trek
The trek up through Gokyo Valley is one of the steepest treks you can do in terms of elevation change. From Namche Bazaar to Gokyo, it’s only around 25km of walking, which many assume could be done in one day. However the elevation changes from 3440m in Namche to 4790m at Gokyo Village.
This dramatic increase in elevation over a short distance means you need to break the journey up into multiple days to allow for proper acclimatisation and avoid getting sick. From Namche, most trekkers stop in Dhole and Machermo for the night before getting to Gokyo.

Extending the Gokyo Lakes Trek
Gokyo lies between Renjo La and Cho La passes. They are part of the challenging Three Passes Trek, which is considered the ultimate trek in the Everest Region. This means that if you’re doing the Gokyo Lakes trek through Gokyo Valley, you can alternatively head back to Namche on the Three Passes trail by crossing one of these two passes.
A popular option for those with more time is to hike up the Gokyo Valley and then cross the Cho La pass which then takes you down to the Everest Base Camp trail. This means you can combine the Gokyo Lakes and Everest Base Camp trek together.
Just ensure that you’re well prepared and aware of weather conditions before setting off to cross one of these passes. At over 5000m, they are challenging and can be dangerous in bad weather.
From Gokyo, the optional day trips are up to Gokyo Ri and further up the valley to the 4th and 5th lakes. The 2km hike up to Gokyo Ri is the pinnacle of this trek and the main reason many people head to Gokyo. However, if you want to spend another day there, you can hike further up the valley to some other lakes, which is best done in October-November season.
Read next: 10 Essential Tips for Trekking in Nepal

Trailheads: Lukla vs Salleri
You can start the Gokyo Lakes trek and Everest Base Camp from a couple of different trailheads. Of course, the most well known trailhead and main starting point for treks in the Everest region is at Lukla. This town in the Khumbu region has an airport perched on the side of a mountain with flights to and from Kathmandu all morning during the high trekking season.
This airport is known as the most dangerous airport in the world with a short runway on a slope. Tickets can go for US$170 one way, which is quite expensive.
The alternative option (for budget trekkers) is to start the trek from Salleri, which is accessible by road. From Salleri, it’s a three day walk to Lukla, adding on extra time. I still saved a lot of money by doing it that way, even including my accommodation and food for the extra days.

Getting to Salleri/Phaplu
There are jeeps running from Kathmandu to Salleri almost daily in the main trekking seasons, which can be booked through your accommodation or travel agent. They usually do multiple pick ups in Thamel, with an incredibly early departure time of 4am.
The road from Kathmandu to Salleri is in relatively good condition, with most of it being sealed now thanks to investment from the Japanese government. It’s still a windy road, and it took 12 hours with seven of us foreign trekkers squashed in the back.
Salleri is the main town and transport hub in the area. However, most trekkers prefer to spend the night in Phaplu which is quieter and just 2.5km further up the dirt road. While most jeeps terminate in Salleri, our driver offered to take us to Phaplu as there were seven of us. Otherwise, you can jump in another jeep from Salleri to Phaplu or simply walk the 2.5km.
Phaplu has one street with a few lodge choices. I stayed at Sunshine Hotel, a small and friendly family run place.

Trek Report: Gokyo Lakes Trek
Below is my day by day experience on the trail trekking from Salleri to Gokyo to give you an idea of what it’s like.
Day 1: Phaplu to Nunthala
Distance: 19km Time: 6.5 hours Ascended: 615m Descended: 725m
From Phaplu, the trail followed the dirt road through the villages along the way until Ringmu where the trail then headed up a steep climb to Taksindu. It had just started to rain as I reached the top of the hill and I stopped to put my rain gear on.
From there it was only 5km down to Nunthala, but it was a steep, rocky trail and the rain turned the dirt to mud. I arrived at 2.30pm to find a cluster of quiet lodges. I walked into Himalaya Trekkers Inn, which was pretty nice and so I didn’t bother to look any further.
The rain picked up and soon thunder and lightening rolled in and I was glad that I’d made it, as other trekkers came in much later completely drenched, cold and muddy.

Day 2: Nunthala to Bupsa
Distance: 11km Time: 5 hours Descended: 716m Ascended: 865m
The rain had been falling all night, but I woke up to a clear sky. I could even see some snow capped mountains in the distance marking the Sagarmatha National Park, still a couple of days away.
I left at 8am and followed the trail as it descended steeply. I got stuck behind a mule caravan carrying goods up to higher villages and I had to slow my pace down. I reached the river at the bottom just as I overtook the mules and then the trail began to climb upwards over rocky steps. I climbed and climbed until finally I reached the top of the hill at Kharikola and walked straight into the first lodge asking for lunch at just 11.30am.
I had a delicious buffalo fried rice and saw the group of four Spanish guys who had been in the same jeep as me to Salleri. I’d only covered 7.5km and it had taken just over 3 hours, it was certainly warming our legs up for what was to come.
The trail meandered around the slope of the mountain before I faced another climb gaining 400m in elevation in just 1km. By the time I got to the top at Bupsa, I was more than glad the day was done. Again, a small cluster of lodges were huddled on the side of the mountain and I picked the newly rebuilt International Hotel where the rooms were actually very nice for a trekking lodge.

Day 3: Bupsa to Cheplung
Distance: 18km Time: 8 hours Ascended: 558m Descended: 516m
The final day of the trek to Lukla, where the “real” trek would start, was primed to be a killer before I’d even begun. Looking at Maps.me on my phone, the elevation map looked like a heart rate monitor, with relentless ascents and descents for 18km.
I started just after 8am and straight up faced a steep climb for 5km. By the time I’d arrived in Puiya, it had taken me 3 hours to cover just 7km. Even though it was only 11am, I stopped for lunch (my lunches were getting earlier by the day).
After lunch the trail became a little, dare I say, flat for a while as it passed through villages. There was now a continuous flow of porters and mules carrying goods up to the lodges on the trekking trails ahead and even young local boys who were heading up to Lukla to find work for the season.
The trail then headed steeply down over rocks and a sludge that can only have been a combination of animal shit and mud. It was such a tough trail to walk over; to take your eyes off the ground for one moment meant you could either lose your boot in the mud or roll your ankle on a rock.
Mule trains were coming and going in both directions and I got more and more frustrated as I got stuck behind them unable to pass. The final kilometre down to Surke took me one hour as I had to constantly wait for the mules to pass on the skinny trail. At Surke, there were two options.
One was to take the trail to Lukla, a steep ascent, and the other was to take the lower trail that continued around Lukla to Cheplung. I took the latter option as it would put me ahead for the next day and I could do without the fancy cafes and WiFi found in Lukla for one more day until I got to Namche.
As I was coming up to Cheplung, I ticked over the 8 hour mark and I was absolutely wrecked. The past three days had certainly been tough, and more than just a “warm up” for the trekking ahead. My thighs were well and truly fit and ready for whatever hills were to come.
Cheplung was on the main trail to Namche and as soon as the minor trail I had been using joined it above Lukla, I suddenly saw all these trekkers in fresh, crisp trekking gear fresh off the plane.

Day 4: Cheplung to Namche Bazaar
Distance: 16km Time: 7 hours Ascended: 905m
Leaving Cheplung, the trail undulated for most of the morning with a continuous flow of trekking lodges, restaurants and shops along the way. After three hours I made it to Monjo where I stopped to have lunch at Mountain View Lodge. The retired-mountaineer and owner had summited Everest five times along with many other Himalayan peaks. He now has the small lodge in Monjo where he feeds hungry trekkers like me with organic vegetables that he grows in his garden.
I sat outside and watched the flow of trekkers, guides, mules, yaks and porters up and down the trail. Just five minutes from Monjo was the National Park office where I had to stop and pay the park fees.
I had been anticipating the big climb up to Namche towards the end of the day and I was already stuck behind mules and large trekking groups as the trail started to climb through the forest. Then the dark clouds opened up and it started to rain. It soon became hail followed by loud thunder and flashes of lightening.
The temperature dropped to near zero suddenly and the trail turned into more of a waterfall as the rain came pouring down. I was stuck behind all these people and animals, frustrated and unable to push on quickly. So I trudged on with all the trekking groups, many already struggling to breathe in the altitude having flown in to Lukla directly.
A small shelter was up ahead and a lot of groups took a break from the ascent, but I took my chance and overtook them. I pushed my legs up and up, just wanting to get to Namche and out of the cold. Then through the rain I could see a wooden structure with a large crowd of people out the front and the sign, “Checkpost”. I couldn’t believe that they were going to seriously make everyone wait in the pouring rain to check every individual permit, but apparently so.
A guide saw me and said, “Are you alone?”, and he offered to get my permit checked with the rest of his group to save me waiting. I was so appreciative and even more so when I found out later that independent hikers had waited for over an hour to get through!
Just 10 minutes further up I came into the first lodges of Namche Bazaar and boy, was I relieved. I wasn’t in the mood to be too picky but at first I saw signs saying 1000 rupees for a single room and I really didn’t want to pay that. I stumbled upon Hotel Valley View and asked the lady how much. When she said 500 for a room, WiFi and charging I was sold.

Day 5: Rest day/acclimatisation day
Most people take an extra day in Namche for acclimatisation, but I was more in need of a rest day than anything else. My legs needed 24 hours without endless hills. Yet, for a little acclimatisation, I decided to walk up to the Sagarmatha National Park Headquarters, 20 minutes above the town. By the time I got there, I realised I was by far not the only one with the same idea and the small plateau was a little crowded.
I overheard a guide tell his group, “And that’s Everest, over there.” I spun around, where, which mountain? And then I saw it. The triangular peak poking out from behind the mountains in front. Mount Everest, the roof of the world, right in front of my very eyes and a moment I won’t forget anytime soon.
I spent a lot of the day relaxing around Namche. It really is a trekker’s megacity, with absolutely anything and everything you could possibly need. From Snickers bars, to knee braces, to down jackets, to I climbed Mount Everest t-shirts, to yak burgers and apple pie, to memory cards and new phones, no matter what you broke or forgot, you could replace it in Namche.
A little girl sat out the front of her mother’s shop across from my lodge and whenever someone walked past she would say, “Hello!”. She was such a friendly girl and when I stopped to look at some of the jewellery her mum had, she pointed to a necklace with the Buddhist endless knot symbol and said, “For good luck.” So for $2 I bought it off her, put it around my neck and only hoped that she was right, that it would bring me good luck on the trail ahead.

Day 6: Namche to Khumjung
Distance: 5km Time: 2 hours Ascended: 350m
To make sure my body was well acclimatised I decided to keep my first day after Namche short. I spent the night in a traditional Sherpa village not far from Namche. I wasn’t taking any Diamox pills and so I wanted to keep any chance of getting altitude sickness at bay, despite feeling good thus far.
From Namche, I had to climb up to the Everest viewpoint that I had done the day before and then continue on from there over the hill and down to Khumjung village. There were a few lodges scattered around and I picked Sherpaland Hotel. After lunch, I walked around the village to the small monastery until it started snowing and I decided to go back and rest.

Day 7: Khumjung to Dhole
Distance: 8km Time: 3.5 hours Ascended: 300m
And so the ascent up to Gokyo Valley officially began. I left Khumjung behind and passed all the souvenir stalls along the way until the turn off to Gokyo. I was glad to be leaving the main trekking route behind and to get deeper into the mountains away from the crowds.
There was a steep incline for an hour up to Mongo where some trekkers stopped for a tea break. However, I decided to keep going and followed the trail as it descended steeply, losing all the elevation I’d just gained. At the bottom were a couple of lodges at Phortse Thanga and I just stopped to pick up a snack before continuing on.
The trail climbed up again steeply and I walked with a pack of yaks heading up with supplies. It was a slow final 3km to Dhole and it took me nearly 2 hours as I had to stop and rest from the steep incline.
Dhole was a cluster of teahouses sitting at just over 4100m. I checked a couple out before settling on Himalaya Lodge, which was one of my favourite lodges I stayed on the trek. The lady was very nice and the food was excellent, but most importantly, they put the wood fired heater on early in the afternoon before the sun set!
I heard stories from other trekkers on their way back from Gokyo about the danger on the high passes of Cho La and Renjo La either side of Gokyo. With such heavy snowfall this season, the challenging Three Passes Trek had been a very risky option for keen hikers, although some were getting across with the help of crampons.

Day 8: Dhole to Machermo
Distance: 5km Time: 2 hours Ascended: 400m
I knew it was just a short day on the Gokyo Lakes trek to Machermo and so I didn’t leave until 9am. The day began with a steep climb up the hill behind Dhole but then flattened out as it snaked around the valley and I was able to pick up my pace. I made it in good time to Luza, passing a lot of other trekkers on the way and then I climbed the last 1km up and over to Machermo.
I arrived in the small trekking village at 11am, a very early end to my day. I could have continued on, however, in order to make sure that I was fully acclimatised for Gokyo it was best to stay the night.
I stayed at Peaceful Lodge as recommended by the lady in Dhole and it was nice and quiet. The manager told me there was a free Acute Mountain Sickness (AMS) talk at the medical clinic every day at 3pm so I decided to head over for it.
A 5 minute walk towards the back of the village was a Sherpa Shelter and Medical Clinic operating as a not-for-profit. They offer free accommodation and medical treatment for all sherpas and rely on donations as well as charging trekkers for medical assistance and evacuations to keep the place running. There were two British volunteer doctors there who gave the 20 minute talk on the prevention, symptoms and treatment for AMS, which was very interesting. You could also get your oxygen levels checked for free.

Day 9: Machermo to Gokyo
Distance: 7km Time: 2.5 hours Ascended: 350m
I surprisingly slept really well considering I was now sleeping at well over 4000m and I woke up eager to get to Gokyo village. I followed a white arrow painted on a rock near my lodge and it took me around the ridge on a fairly flat trail. I noticed other trekkers going up and over the ridge instead and at first I thought I might have been following the wrong trail until I realised the two actually met up on the other side and the way I went was much easier.
The valley slowly opened up and I could see the trail going up into the distance. I was feeling really good and moved at a pretty good pace as I passed trekking groups along the way. At the top of the valley the trail then flattened out as it passed through an amphitheater of snowy mountains, a truly incredible sight despite the grey clouds that had rolled in. As I got closer to Gokyo, I passed more people as the altitude started to take its affect on them.

I made it passed the first couple of Gokyo lakes and then finally the village of Gokyo came into view and I felt a rush of triumph and relief as I had made it to my final destination of the trek. There were around 12 lodges in Gokyo and I first went to a highly recommended place called Gokyo Resort.
It was already packed full of trekking groups and so I quickly escaped to find somewhere more peaceful. A guy said to me, “Looking for a room?” and I followed him to a place called Namaste Lodge. It was a large building and although the rooms were old, the view from the dining room on the top floor had to be one of the best in the village and so I stayed.

Day 10: Gokyo to Gokyo Ri
Distance: 4km Time: 3.5 hours Ascended: 600m Descended: 600m
I set my alarm for 5am and was down at Gokyo lake by 5.20am, just as the sky was turning pink and the high peaks in the distance were an orange tinge from the rising sun. I began the steep, switchbacked trail up to the top of Gokyo Ri, the highest point on the Gokyo Lakes trek.
I was feeling good but took it easy, slowly but surely. This was the very reason I had hiked for nine days, a chance to see one of the best viewpoints in the Himalayas. Naturally, that put a bit of pressure on myself and I was just hoping that my body could get me to the top.
As Gokyo fell further and further below, the view of the mountains around me became more spectacular. I overheard a guide pointing out the triangular peak of Everest tucked behind the mountains in front; once again seeing the mighty mountain with my own eyes.
After the halfway point, I started to really slow down. I felt a little ill in the stomach but my head and chest were fine, so I kept sipping on water and didn’t eat anything. I kept looking up at how far I had to go but was unable to see the top. It was a constant battle trying to prevent negative thoughts coming into my mind, I had to convince myself that I was going to make it.
I stopped to check and I still had 200m of elevation to gain over 600m, which sounds like nothing but at that altitude it may as well be forever. I kept pushing on, stopping around every 20 steps to recalibrate, catch my breath and get oxygen into my body.

A little further and I could see the top, with prayer flags and cairns marking the summit. 400m to go, I was going to make it. Finally, after two and a half hours of slow going I stepped foot on the icy top of Gokyo Ri and man, the view… the fucking view! It was nothing like I’d ever seen before. Everest, Cho Oyu, Cholatse, Aba Dablam, Lohtse, they were all there, right in front of my face with a perfect blue sky backdrop.
There were a few others up there too and even the four Spanish guys who’d caught the jeep from Kathmandu with me to Phaplu. “We made it!”. I was in tears; it was so beautiful and I was so damn proud of myself for getting there; no guide, no porter, no Diamox, a real triumph.
After an hour of enjoying the view at 5357m (the second highest I’d ever been in my life), I descended back to Gokyo within an hour. I was riding on an absolute high and I couldn’t wipe the smile off my face for the rest of the day.

Day 11: Gokyo to Phortse
Distance: 18km Time: 5.5 hours Descended: 1160m
I had originally toyed with the idea of crossing one of the passes, Renjo La or Cho La to go back to Namche a different way. However, hearing some bad stories of deep snow and frost bitten fingers made me think twice, and I decided to just head back down through the Gokyo Valley.
The manager of the teahouse in Gokyo village recommended I take the trail on the other side of the valley instead, so I could at least have a different experience going back. So, after retracing my steps through the valley to the bottom, I came to a junction and decided to turn off left and follow the lesser used trail to Phortse.

It was still a worn track but I could tell that it was far less used than the one I had followed on the way up. It undulated up and down along the valley, certainly not an easy way. I didn’t see a single other trekker and only passed four local porters carrying building supplies the entire day. It was surreal considering how busy I knew other trails were in the region.
I didn’t stop, not even for lunch, and pushed on until I came to a Buddhist Gompa sitting on a hill with a view of Phortse village below. From there, the trail was finally all down hill for the last 3.5km. The village was quiet and at first, I thought I wouldn’t find a place to stay. However, I happened across Namaste Lodge with a man sitting out the front who welcomed me inside. He was a trekking guide himself back in the day and him and his wife were lovely hosts for the night.
The village actually has the highest number of Everest summitters in the Khumbu Region, with many believing that there’s something magic in the water coming down from the mountains in the village. There is a climbing school there as well, where many porters learn how to become a guide.

Day 12: Phortse to Tengboche (optional side trip)
Distance: 3km Time: 1.5 hours Descended: 310m Ascended: 285m
From Phortse, I could have descended down and met up with the same trail I’d used to Gokyo again, or I could divert a little and go to Tengboche (a main stop on the EBC trek). After reading so many books on Everest climbs, I knew how significant the Tengboche Monastery was for Sherpas and the mountaineering community and so I decided to go and see it for myself.
I left Phortse at 9am and followed a skinny goat track that descended steeply down the valley to a river crossing. From there, I had to ascend all the way back up the other side to Tengboche where I arrived at 10.30am. I went straight to Trekkers Lodge, an old independent trekkers favourite and found a small room to stay. I relaxed for the afternoon and the lodge soon filled up with groups all completing the EBC trek.

Day 13: Tengboche to Namche Bazaar
Distance: 10km Time: 3 hours Descended: 555m Ascended: 225m
I had a rare early start and was ready to leave before 8am. The thought of getting back to Namche where I could have a hot shower, internet and any food I wanted was thrilling. The trail had a steep decline first, before a steep incline to where the trail flattened out and skirted around the mountains back to Namche.
I was that excited at the thought of Namche that I walked at a blistering pace, covering the distance in 3 hours rather than the 4+ average for other trekkers. As I was coming towards Namche, I kept glancing back at Everest as it slowly disappeared behind other mountains. The constant stream of trekkers beginning their trek to Base Camp was staggering; there must have been hundreds of people, with high season in full swing.
I went back to the same lodge and the owner remembered me and gave me a nicer room. I dropped my bags and went out to a cafe where I ordered yak steak and fries, exactly what I needed after dal bhat every day for the past 13 days!

Day 14: Namche to Lukla
Distance: 18km Time: 6 hours Descended: 900m
I actually started at 8am again, clearly keen to get to Lukla and the end of the trek. I began my descent down the same trail that I’d climbed in the hail over a week before. I went at a quick pace and passed a lot of trekking groups along the way.
After lunch, the trail had short ups and downs until the last 1km where it gained 100m, just in case your legs weren’t tired and fatigued enough already. I arrived at 2pm and walked up and down the main street of Lukla and picked a random lodge for the night.
I’d originally planned to walk back to Salleri and take the jeep back to Kathmandu again. However, after 14 days in the mountains, I was not looking forward to three more days of walking. The lady at the lodge was very nice and tried to get me a plane ticket out for the next day but with flights having been cancelled for 24 hours already, it was unlikely I would get a seat.

Getting Back to Kathmandu
With flights being cancelled for two days straight due to bad weather, I couldn’t get a seat on a flight to Kathmandu from Lukla.
I wasn’t going to wait for days, so I reluctantly decided to walk back towards Phaplu, to where my trek had began two weeks before. The prospect of another three days hiking was not ideal, particularly knowing that they were not easy, however, my legs were well conditioned by then and I knew I would be able to do it.
As I was just on the outskirts of Lukla, I had a phone call from an agent in Kathmandu who told me to run back to Lukla airport. He’d somehow managed to get me a seat in a helicopter (!) for just a bit extra than the price of the plane. I hurried back up the hill to the helipad where I was flown back to Kathmandu, what a way to end a trek!
Hint: I later learnt that some trekkers pre-book expensive helicopter flights back to Kathmandu for a more exclusive option than the planes. But of course, pilots and scouts prefer to have more bums in seats, so if the helicopter isn’t full you can potentially score a last minute seat for a much cheaper price. It doesn’t always work, but it’s worth asking in Lukla.

Accommodation on the Gokyo Lakes trek
The accommodation was your standard teahouse trekking lodges. You get a basic room with a bed and a shared bathroom. Room charges were 100 rupees up until Namche and then 200 rupees after Namche, while Namche itself was 500. It’s always worth checking out a few lodges before settling on one.
WiFi is available in Namche for free and a local SIM works there too. WiFi is also available at Gokyo and is bought depending on GB and valid days. I paid 800 rupees for use in just Gokyo itself, but you can pay more and have it work across the Everest region.
Most lodges also charge extra for device charging. Some lodges charge around 200 rupees for a full charge of a phone, but in Gokyo prices were quite steep and I racked up 1000 rupee bill for charging both my phone and power bank.
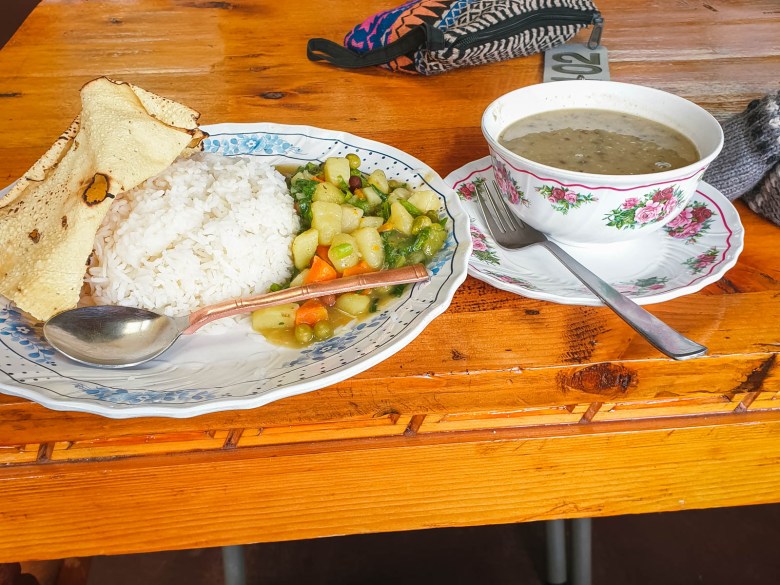
Food
Food was very standard at basically every lodge, with various combinations of rice, noodles and potato. Dal bhat, the typical Nepali dish of rice, dal and veg curry was by far the best choice to fill an empty stomach and ranged from 450 rupees lower down to 600 rupees at Gokyo.
In Lukla, Namche and Gokyo, more fancy meals were on offer, particularly in Lukla and Namche were you could get steak, yak burgers and chicken schnitzel. Gokyo, also has good food options including two German Bakeries.

Trail Navigation
Navigating the trails was very simple and it’s hard to go wrong in Sagarmatha National Park. Starting from Phaplu to Lukla, there is really only one way and there are always local people around if you need to ask.
Once meeting up with the main trail from Lukla to Namche, it is impossible to get lost as the constant stream of traffic and trekking lodges along the way makes it easy to follow.
Getting to Gokyo is also fairly straight forward and there are rarely any alternative trails to confuse it with. All intersections have clear signposts and distance/time averages too.
I used the Maps.Me app simply because I liked to check during the day how far I’d covered and how long I had to go as well as elevation.
Tip: Just a note on yaks and mule trains. Give way to moving yaks and animals on the trail. While they’re not aggressive, they obviously won’t stop to kindly let you pass. Make sure you stand against the mountain side of the trail and allow them to move by you.

Cost for Gokyo Lakes Trek
Permit and park fees: 5000 rupees or AUD$65
Transport (to Phaplu): 2000 rupees or AUD$26
Transport (helicopter to Kathmandu): USD$190
Snacks: 1800 rupees or AUD$24
Sleeping bag rental: 1550 rupees or AUD$20
Meals and accommodation: 33,400 rupees or AUD$430
WiFi: 800 rupees or AUD$10
Souvenirs: 1000 rupees or AUD$12
Total: AUD$585 for 14 nights, 15 days
The helicopter flight back to Kathmandu from Lukla was US$180
More Trekking Guides for Nepal
- Khopra Ridge: How to Complete the Khopra Ridge Trek
- Jomsom: A Guide to Jomsom to Muktinath Trek in Nepal
- Langtang Valley: A Guide to the Langtang Valley Trek
- Trekking Tips: 10 Essential Tips for Trekking in Nepal
- Responsible Travel: Responsible Travel Guide to Nepal
Pin this post


[…] Gokyo Lakes trek in Nepal […]
Love your work, especially regarding Nepal
3 weeks to go and I will be doing your route, super excited! Thank you for all your information!
Amazing article and beautiful photographs, thank you somuch.
This is the perfect Gokyo Lakes trek itinerary! The detailed breakdown and tips make it super easy to follow. Thanks for sharing such an insightful and thorough guide!